Podcast 12 – Clarinet Tonguing (Day 1)

This is part of the series “Teaching Beginning Clarinet – Developing Good Habits from Day 1.” This episode covers the following aspects of teaching clarinet:

  • Face your fears
  • Why we wait so long to start tonguing on clarinet
  • Teaching clarinet tonguing – day 1 – a system and words to use

Free download of all outline notes for the entire 20 episodes (click here to ‘enroll’ in the free course which basically just allows you to download the full packet of Outline Notes. I hope to add more pictures/videos to this course at a later time, but for now it allows you to download all 20 episodes at once.)
Clarinet Tonguing (Outline Notes)
Photo:Clarinet Tonguing (1)

Closed Facebook group (read guidelines and then request access)
BandDirectorsTalkShop.com (Band related articles)
Sign up for the “new resources” list – I don’t do a weekly newsletter, but send out info when there is something new to share. 🙂

Podcast 11 Earning the Bottom Joint

This is part of the series “Teaching Beginning Clarinet – Developing Good Habits from Day 1.” This episode covers the following aspects of teaching clarinet:

  • Reasons to stay on the upper joint
  • GFEDC (Waterfall)
  • How to earn the bottom joint
  • Making it a big deal

Free download of all outline notes for the entire 20 episodes (click here to ‘enroll’ in the free course which basically just allows you to download the full packet of Outline Notes. I hope to add more pictures/videos to this course at a later time, but for now it allows you to download all 20 episodes at once.)
Earning the Bottom Joint (Outline Notes)
Why Beginners Only Need 1/2 Their Instrument the First 6 Weeks of School (Article)
Right Hand Down (or Not) – article coming soon
Closed Facebook group (read guidelines and then request access)
Sign up for the “new resources” list – I don’t do a weekly newsletter, but send out info when there is something new to share. 🙂

Why My Beginning Clarinets Only Need 1/2 their Instruments for the First Weeks of School

For more in-depth explanations on many of the points in this article, subscribe to the free clarinet podcast “Crossing the Break” on iTunes. The first 20 episodes are a detailed look at the first 2 months of beginning clarinet class. Episode 11 relates most directly to this article.

Many of us would agree that when teaching new concepts, it can often be helpful to isolate the idea we want the students to think about the most. The “new” part. Teaching a beginning clarinet player the first few weeks includes a TON of new things. Posture, air, embouchure, hand position, rhythm, foot tap, reading music, etc. (Notice I don’t mention tonguing. I hold off on teaching tonguing as long as possible.)

Again, I feel many of us would agree that tone is the most important concept – not just in the first 6 weeks, but the entire first year. Tone. Tone. Tone. Everything else is secondary.

It is common to start beginning clarinetists on mouthpiece and barrel. I do this as well. I strongly, strongly encourage you to continue to have students play on mouthpiece and barrel (to check pitch) at the beginning of class for many weeks.

Then most directors go from the mouthpiece and barrel to the entire instrument. This requires that – all at the same time – students must try to master both left and right-hand position, finger motion and, fairly quickly, note reading/music reading. They must also deal with a whole new level of resistance when blowing through the instrument and a strong support from the right thumb at the same time. That’s asking kids who are still developing the muscle memory for embouchure to add many different things all at once.

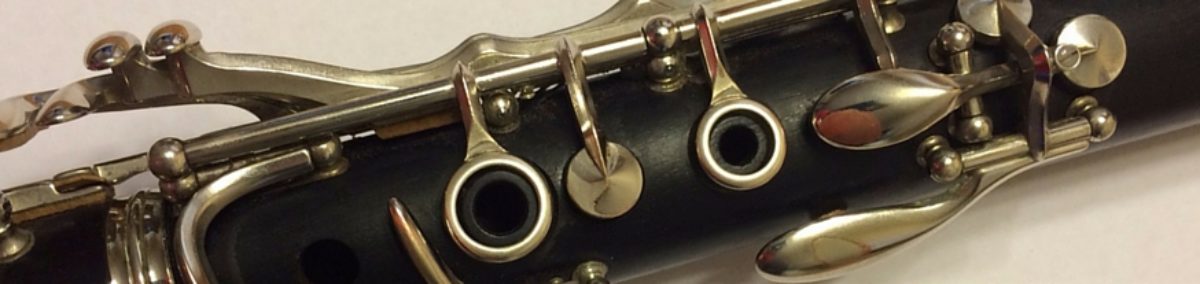
So, about 15 years ago, I started wondering why we have clarinet players add the entire instrument so ‘early’. Students only use the top joint for their first 5 notes. (I don’t have my students add right hand down as standard fingerings on open G. Post explaining why is here.) They can often play many pages in the beginning band book with just upper joint.

Clarinet has a perfect, built-in way to simplify the process of moving from mouthpiece/barrel to the full instrument in a much more gradual, natural way. It can avoid all kinds of bad habits. As you know if you listen to the CrossingTheBreak podcast, one of my big beginner band mantras is “No bad habits!”

1/2 instrument
Only have your students only add the upper joint. For quite a while.
Here are some reasons why:

    1. It is much less awkward. Most beginners, especially small ones, find holding the entire instrument very awkward and uncomfortable.
    1. There is less resistance when blowing through upper joint only. It is still considerably more than mouthpiece/barrel, but less than the entire instrument. So their embouchure muscles are gradually strengthened by adding small amounts of resistance.
    1. This allows them to use their left hand to hold a mirror and look at their embouchure as they play open G.
    1. When they add the left-hand position, they can concentrate much more on keeping their fingers perfect. Here’s what I tell them with regards to finger position:
      – Thumb barely touching the register key and very close to the thumb hole.
      – Fingers 1,2,3 are hovering as close as possible – PAD of the finger over the hole (not tip.)
      – Left Pinky key is touching the ‘upper joint pinky.’ (some directors call it the C# key)
    1. Their right hand is on the barrel and can help them to anchor on their top teeth firmly. When they move to the right thumb pushing up from the thumb rest they will have a better concept of what it should feel like if they have experienced it for a long time on upper joint.
    1. They will have less squeaks and greater success on the first songs they play. For all the reasons listed above, everything will feel less frustrating.
  1. You are eliminating the option for untold bad right-hand positions. By the time they add the bottom joint, the left hand and embouchure should feel so natural, that they can then focus much more attention on the right hand. Plus they will be actually using the right hand to play Bb, A etc. so it will have to be in the right place.

Here are a few more additional benefits that aren’t a big deal, but are a nice bonus. The first 6 weeks of school are chaotic in any beginning class, but especially in clarinet class. Anything you can do to limit chaos is a plus.

    • It doesn’t take students as long to get their instruments out and ready
    • Easier to monitor assembly as a group
    • Less corks to grease daily
    • Less chance of students breaking something due to assembly or awkwardness
  • Less time taking instruments apart

All of this translates to more order and more teaching time.

For heterogeneous classes – the open G should be ok with just upper joint and the F as well. As you get to E, somewhat D and absolutely C, you will have to either add the bottom joint or have the clarinets play alone. The C is basically a C# and the D is very sharp. See what you can come up with, (and let me know if you have a great solution!) but even if it’s just one week that they can play on upper joint, that’s certainly better than nothing.

***Also for heterogeneous classes, the students can put the bottom joint on but still hold the barrel with their right hand. That takes care of the D & C but still allows them to not have to add right-hand position and helps them continue to anchor correctly.

Remember the saying, “The most dangerous phrase in the English language is ‘we’ve never done it that way before’.” Maybe this is one new idea you can try out this year.

CLARINET PODCAST & RESOURCE WEBSITE
A 1999 music education graduate of WTAMU, Tamarie Sayger held band director positions in Plano and Odessa, TX for 5 years. As a private clarinet instructor in Texas for 16 years, she has taught hundreds of students from grade 6-12 in classes, sectionals, and individual lessons. Mrs. Sayger has presented at district in-services and co-presented at the Texas Bandmasters Association convention. Her website, CrossingTheBreak.com, provides resources for clarinet teachers around the country.  Her podcast, Crossing The Break, can be found on iTunes.

Want more clarinet resources? Sign up for the monthly(ish) updates here.

Clarinet Upper Joint

Podcast 10 First Note Reading & Note Name Games

Subscribe FREE on iTunes!

This is part of the series “Teaching Beginning Clarinet – Developing Good Habits from Day 1.” This episode covers the following aspects of teaching clarinet:

  • Supplemental pages to start reading music
  • Note name games
  • Note name worksheet

Free download of all outline notes for the entire 20 episodes (click here to ‘enroll’ in the free course which basically just allows you to download the full packet of Outline Notes. I hope to add more pictures/videos to this course at a later time, but for now it allows you to download all 20 episodes at once.)
1st Reading & Note Names (Outline Notes)
Getting Started
More Lines to Play
Note Name Worksheet (C-B) (every line different objective)
MusicTheory.net (ideally kids do this one at home)
Link to Note Name Game 1 (2 line race) – I hope to post a video eventually
Link to Note Name Game 2 (colored staff – ideal for younger ages) – I hope to post this soon. Here’s a few pictures though – Call out “second line” or “G” and they put on a penny. Or have them spell “FACE.” etc.
Note Name games
Closed Facebook group (read guidelines and then request access)
Sign up for the “new resources” list – I don’t do a weekly newsletter, but send out info when there is something new to share. 🙂

ATSSB Clarinet All-State Etudes Year B Tips

ATSSB Clarinet All-State Etudes Year B Tips

Need some help teaching your students the ATSSB Clarinet All-State Etudes? This FREE measure by measure guide is what you’re looking for!

You’ll want to go to this link to download a PDF of all tips for BOTH Clarinet Year B etudes – completely free. The download also includes pictures, information about the “Clarinet Law of Minimal Motion” and a copy of the “4 Rules to Choosing the Right Clarinet Fingering” page.

Slow Étude Tips Overall
Tone, Tone, Tone!
“As smooth as glass”
Be sure you have a great reed (on both etudes)
Tons of dynamics – overdo dynamics (within reason)
Pay close attention to the releases of notes before breath marks Use a metronome!
Count in your head
Learn the dynamics from the earliest practice sessions
Play with good phrasing from the beginning
–(if you need extra breaths, make them musical)
Musical Terms (as defined in the back of the étude book):
— con espress. – with expression
— sostenuto – sustaining
— sempre – always, throughout the entire duration

Slow Étude Tips by Measure Number
17 – Third line B – right hand Bottom/Bottom key (personal preference)
21 – Drill 16ths under tempo, with a metronome daily and speed up slowly
21 – Last note B – right hand Bottom/Bottom key (personal preference)
22 – Third line B – right hand Bottom/Bottom key (personal preference)
22 – Keep right hand down throughout beat four
24 – Keep right hand down throughout measure
24/25 – Trill B natural to C, then C to D, then D to E – Always hold the ‘main’ note for a bit before beginning the trill. Start a little slower and then speed up. Don’t trill too fast – it’s a slow, musical piece!
25 – Be sure tongue is in “ee” position (high) & air is moving very fast to help high C respond 26 – C# on the right coolio key (personal preference)
26 – Leave right hand down as you go to A# (Bb) and back to B
26 – Third line Bs – the one immediately I play right hand Bottom/Bottom key as a personal preference. However, the B on the last triplet MUST be played on the right hand Bottom/Bottom because it’s next to a C# which MUST be played on the left – no sliding! 26 – Keep everything from beat 2 on smooth – don’t lift the ends of slurs
27 – C# (both of them) on the right coolio key (personal preference)

EVERY DAY SPOTS (Practice these EVERY DAY! Start slowly.) Measure 21 beat 2, Measure 22 beat 3-4, Measure 26 beat 3-4, Measure 27 beat 1

FOR ETUDE #2 (Fast ETUDE) go to THIS link. Download a PDF of all ATSSB Clarinet All-State Etudes Year B tips for BOTH etudes – completely free. The download also includes pictures, information about the “Clarinet Law of Minimal Motion” and a copy of the “4 Rules to Choosing the Right Clarinet Fingering” page.

Clarinet fingerings 

ATSSB Clarinet

A 1999 music education graduate of WTAMU, Tamarie Sayger is currently teaching band in Texas.  As a private clarinet instructor and band director for 17 years, she has taught hundreds of students from grade 6-12 in classes, sectionals, and individual lessons.  She previously held band positions in Plano and Odessa, TX for 5 years. Mrs. Sayger has presented at district in-services and co-presented at the Texas Bandmasters Association convention. Her website, CrossingTheBreak.com, provides resources for clarinet teachers around the country.  Her podcast, Crossing The Break, can be found on iTunes.

Teaching Clarinet

ATSSB Clarinet All-State Etudes Year A Tips 

Download a PDF handout of the following tips for your students – ATSSB Clarinet Etudes Tips

Slow étude tips overall
Tone, Tone, Tone!
“As smooth as glass”
Be sure you have a great reed (on both etudes)
Tons of dynamics – overdo dynamics (within reason)
Pay close attention to the releases of notes before breath marks
Use metronome!
Musical Terms (as defined in the back of the étude book):
– con grandezza –  with grandeur, with dignity

– intimomente – intimately
cresc. – getting gradually louder

Slow étude tips by measure number
2 – Keep right hand down the entire time down
3 – Keep right hand down on the 16th notes
Read this article on playing in this mid-range smoothly
Read this article on hand position to help with smoothness
4 – Last note should be Ab (only a problem in earlier editions)
6 – Count rhythm very carefully, don’t chop E, take a very big breath
Read this article about not chopping notes before rests
7 – Learn without trill/grace notes 1st, then add grace notes, then add trill. Practice the trill/grace notes separately and then add to music. Tap foot.
8 – Careful counting, don’t forget to tongue when needed, keep right hand down on G#9
9 – Right hand down on A, be sure to tongue where needed
10 – Fast air, pop fingers to keep the large jumps smooth, don’t chop C

Fast étude tips overall
Confidence! Should sound easy.
Don’t let tonguing distort tone.
Overall light, bouncy tonguing
Staccatissimo is shorter and exaggerated
The duramente should be more intense (firm), but not at the expense of tone
The 2nd half will need more practice time than the first half. A lot more.
Dig in and start working on m. 17 – end early and slowly.
Keep fingers as close to keys as possible at all times
You need some tonguing exercises to speed up your tongue so it can execute.
Use a metronome! Even fingers are a must.
Musical Terms (as defined in the back of the étude book):
– duramente – firmly, with hardness
– leggiero – light, graceful

Fast étude tips by measure number
1 & all similar measures – be sure you tongue correctly. It is tempting to tongue slur 2, tongue 2 on the 2nd half of the measure, but it should be slur 2, tongue 4.
3 – be sure you count the right amount of rests – it has an unusual feel when fast
4 – practice without grace notes 1st, add later
7-9 lean on downbeats a bit to give it a “lilting” feel
10 – trickier than it looks when you get to a fast tempo – practice it extra
11-13 lean on downbeats a bit to give it a “lilting” feel
(Use these pictures for fingerings)
Clarinet fingerings
ATSSB Clarinet
17-21 – Correct fingerings are:
      17 – 1st Db – Right coolio (personal preference)
           – Eb – TopTop
2nd Db – outside left
Gb – thumb, 2 side keys
Eb – thumb 1,2, banana (personal preference)
       18 – B natural banana
C eighth note – Left golf club
       19 – Db – outside left
20-22 Correct fingerings are:
      20 – 1st Db – Right coolio (personal preference)
           – Eb – TopTop
           – 2nd Db – outside left
Eb – thumb 1,2, banana (personal preference)
It’s also helpful to know that the differences between these 2 patterns (17-19 and 20-22)are that the 2nd pattern has no A natural, no Gb, and no low B natural.
      22 – Db – outside left
      23 – Bb – bottom side key
25-27 Correct fingerings are:
      25 – Eb – thumb 1,2 and 2 side keys
           – Gb – middle
           – Eb – TopTop
           – C – Left golf club
           – Gb – top 1st finger
           – Eb – thumb 1,2 and 2 side keys
       26 – Db – Right coolio (personal preference)
            – Gb – top 1st finger
       27 – Gb – outside left
            – Eb – TopTop
            – C – Left golf club
            – Eb – thumb 1,2 and 2 side keys
Don’t forget to Download a PDF handout of the above tips for your students (includes pictures) – ATSSB Clarinet Etudes Tips and Lessons

Podcast 9 Playing GFEDC

Subscribe FREE on iTunes!

This is part of the series “Teaching Beginning Clarinet – Developing Good Habits from Day 1.” This episode covers the following aspects of teaching clarinet:

Podcast 08 Hand Position & Mouthpiece Only

Subscribe FREE on iTunes!

This is part of the series “Teaching Beginning Clarinet – Developing Good Habits from Day 1.” This episode covers the following aspects of teaching clarinet:

  • Starting hand position (left hand only)
  • The thumb, fingers 12&3, the pinky
  • Finger drills
  • Mouthpiece only (pitch between C-C# concert)
    Free download of all outline notes for the entire 20 episodes
    (click here to ‘enroll’ in the free course which basically just allows you to download the full packet of Outline Notes. I hope to add more pictures/videos to this course at a later time, but for now it allows you to download all 20 episodes at once.)
    Hand Position & Mouthpiece Only (Outline Notes)
    Thumb positions:

    Thumb1
    Thumb covers tone hole and pushes register key at the time
    Thumb2
    Thumb opens register but doesn’t cover tone hole (notice it’s so close it looks like it’s covering)
    Tone hole only (thumb barely touches register key)
    Tone hole only (thumb barely touches register key)

    Hand position from the front:
    Clarinet hand position

    Closed Facebook group (read guidelines and then request access)

Podcast 07 Keep it Fun & Open G

EPISODE 07  SHOW NOTES

This is part of the series “Teaching Beginning Clarinet – Developing Good Habits from Day 1.” This episode covers the following aspects of teaching clarinet:

Podcast 06 Up to Pitch (Part 2)

EPISODE 06  SHOW NOTES

This episode of the Crossing The Break podcast covers the following aspects of teaching clarinet:

  • Helping clarinet students get up to pitch on mouthpiece & barrel
  • External embouchure problems and how to fix them

Free download of all outline notes for the entire 20 episodes (click here to ‘enroll’ in the free course which basically just allows you to download the full packet of Outline Notes. I hope to add more pictures/videos to this course at a later time, but for now it allows you to download all 20 episodes at once.)
Up to Pitch (Part 2) (Outline Notes)
Pictures of embouchure (Link to pictures)
These are the “muscles” I look for:Look for muslces1 (1)
This is how much mouthpiece I take:
Mouthpiece 1Mouthpiece Side
Closed Facebook group (read guidelines and then request access)
BandDirectorsTalkShop (articles on a variety of band topics)

Podcast 05 Up to Pitch (Part 1)

Subscribe to Crossing the Break on Itunes.

EPISODE 05  SHOW NOTES

This episode of the Crossing The Break podcast covers the following aspects of teaching clarinet:

  • Internal symptoms that can cause students to be flat on mouthpiece and barrel
  • Words to say and things to try to help them fix it

Free download of all outline notes for the entire 20 episodes (click here to ‘enroll’ in the free course which basically just allows you to download the full packet of Outline Notes. I hope to add more pictures/videos to this course at a later time, but for now it allows you to download all 20 episodes at once.)
Up to Pitch (Part 1)  (Outline Notes)
Up to Pitch (Part 2) (podcast)
Why Are My Clarinets Playing Flat? (article)
4 Clarinet Hacks (info about mouthpiece patches)
Photos:

Blow air across reed
Air across reed
Fast, cold air (like blowing out birthday candles)
Mirror edit
Keep Mirror Up High


Anchoring visualization
Wiggle Check
We were focused on the wiggle check here and the chin is not flat enough. But this is how I do wiggle checks.

Pictures of embouchure can be found with Episode 4 here.
Closed Facebook group
(read guidelines and then request access)